More Advanced and complicated projects :
Reptile terrarium rock wall background
On this web page you'll find a tutorial on how to build a fake rock wall background for a reptile terrarium.
This process was inspired, in part, from the open discussion forums found on Beardeddragon.org, and the community on Youtube!!!
Be sure to check out the video below
which details the entire process from start to finish. There is a slight safety precaution. If you're building this faux rock for a creature that does not have expert climbing skills you may want to avoid creating platforms or ledges where a lizard such as a bearded dragon could get too high and thus risk the danger of falling.
he "hide" which also acts as a platform or basking spot featured in this structure is built very low to the ground providing a safe climbing/basking spot.
This particular faux rock construction could be used for fake rock paneling or some other purpose other than the back of reptile habitats. These structures are not the strongest of structures and cannot support the weight of a person, they are really meant for lightweight reptiles and other critters.
The first thing you want to do is research how you want your reptile terrarium background to look. The Internet provides a wealth of nature pictures, as well as ideas borrowed from web sites such as the one you're on right now!
VIVARIUMS BACKGROUNDS Part 2 of 2 :


***Also, check out this other reptile terrarium fake rock wall! (below) It's very similar to the main project on this page, but has a slightly different look.
What I did first was measure the back of the cage I was using. I know from previous experience with using grout that the final product would wind up being larger in all directions.
Because of this I made the design slightly smaller so as to be able to eventually fit the structure back into the cage once it was done. This amounted to around 1/8 to 1/4 inch in all directions.
I began by using a sheet of polystyrene to create this reptile terrarium. Next, it was a process of breaking off pieces of polystyrene in order to create the shapes of rocks. I glued them down with an adhesive called loctite's Power grab.
I then proceeded to create the hide which consisted of a basic L shaped design. After the basic hide was created I also glued rock shapes onto the L shape hide. Occasionally I made sure I put the structure back into what was to be a reptile terrarium -just to make sure it fit.Then I proceeded to apply 2 to 3 layers of non sanded grout. The grout is the same stuff in between your bathroom tiles, and its primary purpose is to strengthen the structure; but it also contributes to the look -creating a more natural faux rock look.
Reptile habitats need some strength to hold up to the continued abuse of whatever lizard or snake you have a living in the cage. The more grout you apply the stronger your reptile terrarium will be.
Next, you want to decide whether or not you want to paint your faux rock construction. I decided to use a dark gray color to enhance a jungle themed terrarium. What I did was purchase a dollar store spray water bottle and mix together some gray acrylic paint with water.
This allowed me to paint the structure very quickly. The video above on how to create your own reptile terrarium fake rock back ground details this process .
As At Last Stage want to use a nontoxic sealant to do several things. One, a nontoxic sealant will keep your reptile from inadvertently ingesting anything harmful. The sealent will also make your life much easier, as the structure is much easier to clean if it's got a barrier of sealant. The sealent will also make your structure last longer.I hope this tutorial has been helpfull, be sure to watch the video above on how to create great reptile habitats for your reptile terrarium.
Fake rock wall video -demonstrating a nice intermediate level corner unit :
Using Natural Element as a background :
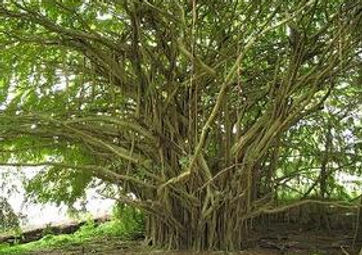
18x18x18 Banyan Root Background Build Journal:
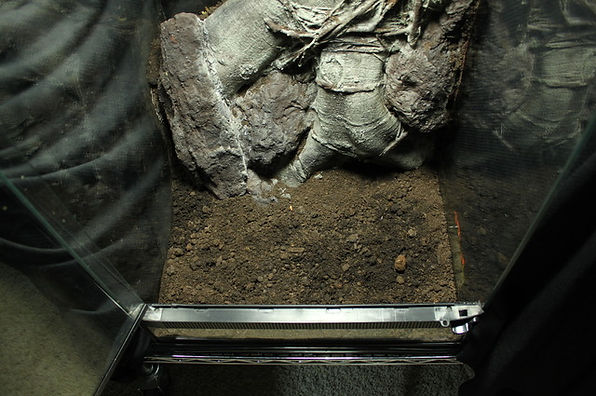
This vivarium was a very easy build and is something you can do in about a day. The vivarium is an 18x18x18 made from acrylic and is the same internal dimensions as a the Exo-Terra and ZooMed 18x18x18 terrariums. This background can be found on in the shops ( Or Click Here ) . It is a replica of the banyan tree roots found in Hawaii and has excellent detail.


I started off by dropping the Flex-Resin background into the vivarium. The Flex-Resin is supported with a flexible foam but it is not 100% solid foam behind it, so I needed to foam and glue the background into the vivarium. This was done using the canned "Great Stuff" polyurethane foam. Before I sprayed the foam in, I placed onto the back some plastic plant cups.
I allowed the foam to cure for about 5 hours. (Your foam may take much longer depending on temperature/humidity.) I then cut the excess foam around the plant cups.
I next placed the tank on it's back and applied, with a gloved hand, brown silicone sealant onto the foam. Then before it dried, I coated the wet silicone in dry spaghnum peat moss. For a more indepth explanation of this technique,
Before applying the silicone, I placed down some blue painters tape onto the acrylic so I could make a clean straight line. Before the silicone cured, but after the applying the peat, I removed the tape slowly. This gives a nice clean edge without having to use a razor, which isn't a good idea on acrylic tanks.
Lastly, I allowed the silicone sealant to dry, dusted off and shop-vac'd off the remaining peat moss, and planted the tank.
ARTICLE : Tree Root and Buttress Backgrounds :
Highly detailed, ultra light replicas of tropical tree roots and buttresses commonly found at the base of Banyan and other large tropical trees.
Original molds made by using Exhibit-Mold and Exhibit-Cast in the field in Hawaii.


-
Mold made in the field at Rainbow Falls State Park in Hilo, Hawaii.
-
The large banyan tree found in the park has long grown its roots into the surrounding lava rock, while other species of vines grow along the larger root surface. This mold was taken to help show some of this.
-
Mold is designed to fit into an Exo-Terra or ZooMed 18 x 18 x 24 enclosure.
-
This mold intentionally has areas that can be easily cut into to plant live or artificial plants.
-
You can cut this mold down to a lower size (18x18x18) if needed.


-Another types and shapes of tree roots butlers ( Or large root elements ) :
- An example of tree roots backrounds :
courtesy to : www.www.vivariumworks.com
- 8ft x 4ft x 10mm ply wood = £20+
- a 5 pack of small round vents (think ive changed my mind on actually using these as my vents)
- 2 x 8ft decorative beading
- 2 x 8ft 15mm wide plain beading
I will be getting a bearded dragon soon but first i want to get her/his home completely finished and supplies bought before i do anything like bring him/her home.
first of all i obviously needed to collect my materials for the viv so off i went to trusty BnQ. i bought :
which all came to a total of £47.odd plus the burger i bought £50
the good thing about BnQ if you don't already know which im sure most of you do but BnQ cut the wood to your exact measurements, which extremely time saving and will be true straight cut !!!
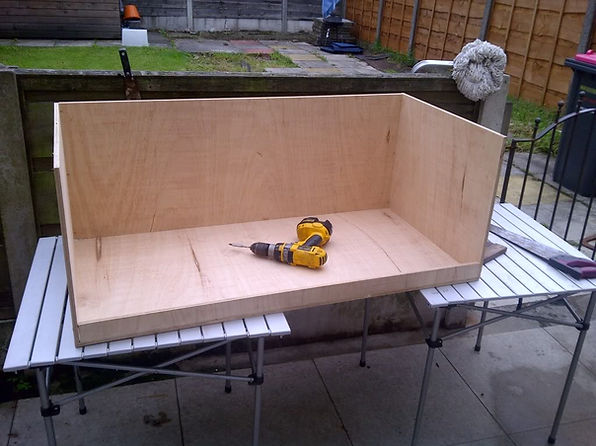
After messing about at BnQ i cracked on at home, building the planks of wood together.


Then i whilst searching ebay i discovered a vivarium background, so i thought wow i will have that, so i stopped building for a few days because i thought its going to alot easier if i fit this background with the lid off. WELL when it came in the post in a tiny ! tube i thought hang on this is defiantly not the 3D background unless is some blow up one haha ! anyway it was just a picture with a sticky backing, and i was gutted so because i had it in my head that i was going to have a 3D background i decided to have a go at making one my self as you do
so back to BnQ for some tile grout, polystyrene, and paints. but BnQ couldn't help me with these products so i went to wickes who had an 8ft x 2ft x 50mm for only £6.99 so i had one of them and then went to get some paints and grout and the prices were terrible soooo i went to a brilliant outlet place near where i live called brooklyn outlet and basically its all dented and dropped building, painting, decorating gear at amazing prices, and i got a bag of grout which covers 6.5square meters for £3.99 and to medium tins of paint both £3.99 each sadly they dont have polystyrene because they only have "broken" products from bigger building stores like BnQ but in my opinion their products are perfectly fine and not! broken
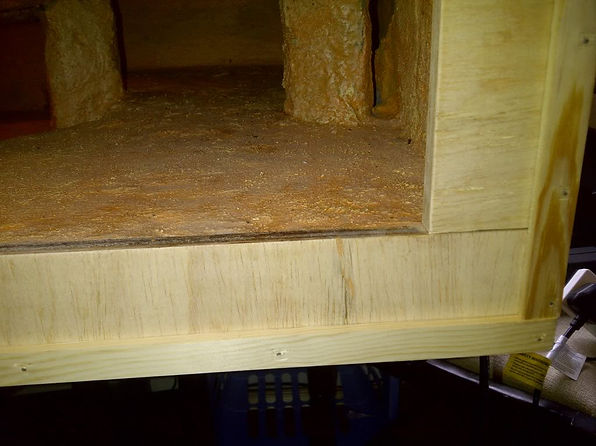
here are some pictures of starting the background / whole desert scene up until were i am now basically i just chopped polystyrene up with a little imagination and progressed

then after i had cut and shaped and burnt all my peices i stuck them together and to the viv with silicone any will do to be honest, i used a cheap silicone from work and it stuck as they say "shit to a blanket", the grouting needed doing .... all i did was mix some grout abit more watery than normall than covered the whole thing and i will do this for about another 3 coats.


I will be using normal paint simply because i have read and looked for safe paint but had no luck, i might be varnishing the paint afterwards to seal it with a flat matt plain varnish. i will defonatly be dry brushing after my base layer and hopefully it should get even better, im glad ive inspired you my advice seriously is GO FOR IT what is there to loose i have only decided to do the background work within a few days and it seems to have worked out well.
and as for the sand comment i think i will be going for the calcium sand only because at the end of the day im not looking to go the cheap way for my beardie i dont want to cut any corners but thank you very much for the advice


I will be putting my first and maybe second coat of base layer paint


I m going to be using sand as the substrate but on the rocks ..
I got out the drop saw so i can get perfect 45 degree angles on the decrotive strips (main part of the runner system) the bottom and two side strips are nailed down but you will notice the top strip isnt this is because im going to be sticking this to the glass with no nails and it will act as a handle for lifting out the glass but when the glass is in place on the viv the top peice of decrotive strip will just appear to be apart of the other strips, and completing the decrotive strip all around. i did this because i wanted the glass to be in one peice and have no holes or handles attached.


FINALLY FINISHED:
the thing is i need the glass today because im collecting the beardie tomoz and i want it to be up and running tonight ready for the beardie to walk straight into plus ive put a deposit down ..... i will get either toughened glass or perspex another time .


